Phil Davis: Well I don’t expect any gratitude…
Bob Wallace: Well you’re gonna get it. We did great, and I’m grateful. So thank you, thank you Phil Davis, from the bottom of my heart…now will you let the rest of my alone?
Phil Davis: No I won’t.
Bob Wallace: Well, why not?!
Phil Davis: Because you’re a miserable, lonely, unhappy man!
Bob Wallace: Oh you’re wacky. I’m a very happy man.
Phil Davis: Well then you’re happy for the wrong reasons, and that’s the same as being lonely and miserable, except it’s worse.
Bob Wallace: You know something. You’re off your nut about a mile and a half. I got everything in life I want.
Phil Davis: Ohhhh suuureeee. I’m off my nut a mile and a half…
Bob Wallace: At least…
Phil Davis: You’ve got everything in life you want?
Bob Wallace: Yes.
Phil Davis: Except the most important thing.
Bob Wallace: What’s that?
Phil Davis: A girl!
Bob Wallace: Well…I’ll get around to that one day.
Phil Davis: My dear partner, when what’s left of you gets around to getting what’s left to be gotten, what’s left to be gotten won’t be worth getting, whatever it is you’ve got left!
Bob Wallace: After I figure out what that means, I’ll come up with a crushing reply…
BAHAHAHAHAHAHA!!!! That one line (the one in bold) folks is pretty much the only reason I watch White Christmas every year. That, and the scene of Danny Kaye and Vera-Ellen tap-dancing on an upturned rowboat. Oh! And the scene where they’re all in the train on the way to Vermont and make a snow-covered mountain out of some napkins and salt and pepper shakers, singing “Snow! Snow! Snow! Snow! Snow!”.
Oh! Oh! And I guess, one can’t forget the scene where Danny Kaye and Bing Crosby dress up in sparkly powder-blue dresses and start singing “Sisters, sisters”, whacking each other with similarly powder-blue feather fan things. Classic! Every year, I wonder how risqué that scene must have been considered. White Christmas was released in 1954, after all.
All that being said, I’m not actually the biggest fan of musicals. (*cough* Understatement of the century there). Apart from, White Christmas, Singing in the Rain, and, of course, classic Disney movies (excluding Snow White and The Lion King. Blasphemous as it may seem to many, I LOATHE those movies!), I can’t do musicals. The constant breaking-out-into-song-and-dance thing drives me right up the wall. I end up screaming at the screen, “Just SAY the words dam*it and stand still!!!” (You think I’m kidding…)
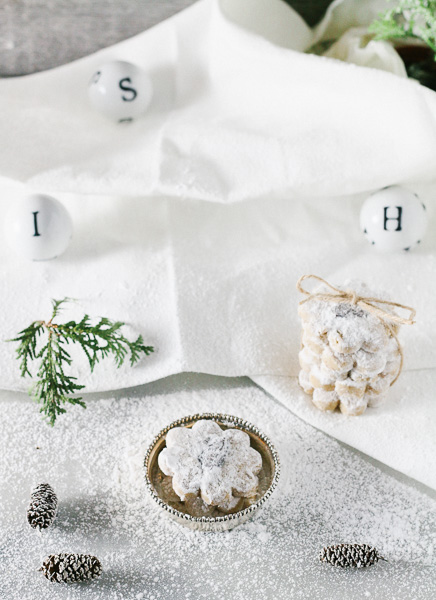
However, I have to admit that I think that snow-covered mountain made out of napkins and salt shakers was in the back of my mind when I set up the photos for this recipe. I had a vague idea of what I wanted to do floating around in my head for a couple of weeks, but the firm image didn’t pop in my head until a friend and I went to a wicked artisan fair in Montreal called Puces Pop! SO MANY quality artisans selling their wares at REALLY reasonable prices; everything from cocktail bitters and syrup kits, jams, and hot sauces, to linen ware, prints, jewelry, and pottery.
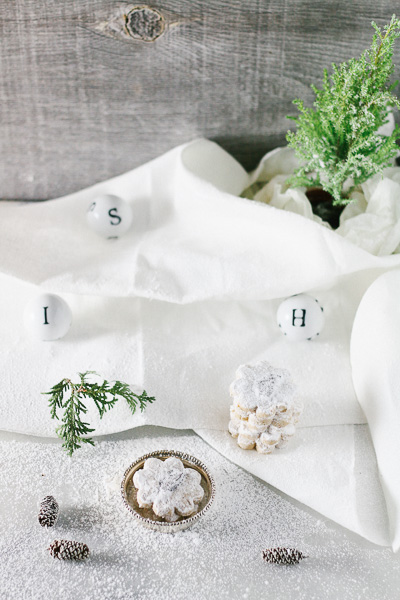
“Snow! Snow! Snow! Snow! Snow!”
Better yet, apparently, there are 3 or 4 of them throughout the year. I’ll be going to every single one! And anyone living in MTL should check them out as well!
Newho…remember my Paleo Mongolian Beef ‘n’ Broccoli post? You know, the one where I talked about procrastinating from studying for midterms by doing some prop shopping? Well, I had told myself then that once I was done with this heinous semester, I would go prop shopping at my favourite housewares store in MTL, V de V. Even after that bout of midterm prop shopping, I was still dying to get me some linen towels and some better glasses and such for my photos.
Well..between the Puces Pop artisan fair and V de V (which my friend and I just happened to be walking by on our way home), I got all that, and then some!!!
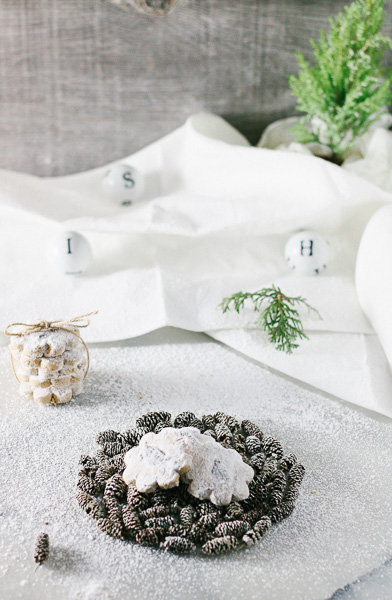
I got me some linen towels made by a local Montreal artisan, Tings (seriously…her stuff is of super bon quality), a cute jug, an apothecary like jar-thing, another glassware thing with a handle (I’m killing this whole proper-use-of-adjectives-to-describe-things thing), and best of all…three white balls with the letters, I, S, and H on them!!! They have absolutely nothing to do with food, but my Dad (the artist in the family) has, for years, used X, Y, and O balls in his photos.
When I was growing up, Dad would bring the bro and I out to the studio to see his latest “beautiful painting”. Unfortunately, abstract paintings are a bit too…well…abstract for a 10 and 12 year-old to really understand, so we would just look at the painting and go, “Yea, yea Dad. Nice job.” before turning around to go back in the house to watch The Simpsons.
When I was in high school, however, my Dad started doing this really cool thing where he would hang one of his paintings in the studio, set up a scrap piece of wood as a shelf in front of it, put the gamut of objects on it (flowers, books, bugs, he!l, he even used gold fish in a see-through wine bucket for a few of ’em), and then take a picture of the whole scene using his ANCIENT 4×5 camera! It was like the Renaissance meets once-modern photography, meets currently-modern digital print production.
One set of props that he used, and still uses, a lot was his X, Y, and O balls. They, like the dead bugs and bird’s nests, etc., would be hidden in the picture like a where’s boggle puzzle, drawing your eye around the image. (If you want to see what I’m talking about, head over to his website! I promise you’ll love these photos!)
I don’t know why, but those X, Y, and O balls are my favourite prop of his. It may be the fact that they’re black and white. (Throw in some lime green or royal purple and you have my favourite colour scheme). It could also be the Times New Roman font on the ball making them look so classic, yet chic; somehow bringing language and writing into the photo, the same way the Renaissance melded art and the written word.
Regardless of the reason, I legit started squealing when I saw the I, S, and H balls in V de V the other day. My friend probably thinks I’m nuts. At the very least, she thinks I’m quirky. Thankfully, she’s a musician herself, so there’s no judgment, just amusement…I hope.
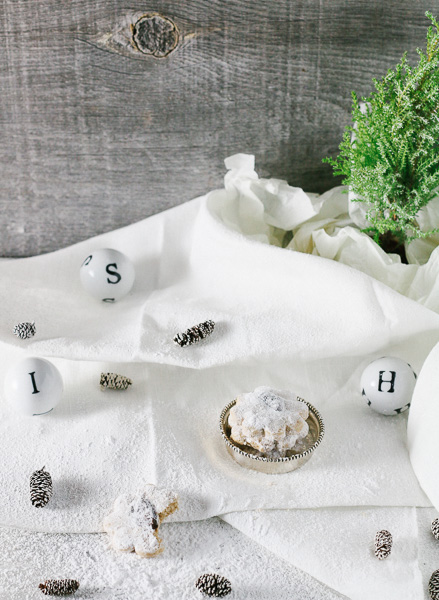
See! I, S, and H! (In case you haven’t seen them in any of the other photos in this post…) They’re so cute!
So…after I’ve spent THIS long talking about ceramic balls, the point I’m really trying to make is that these beauties will be featured in many future posts. Heads up.
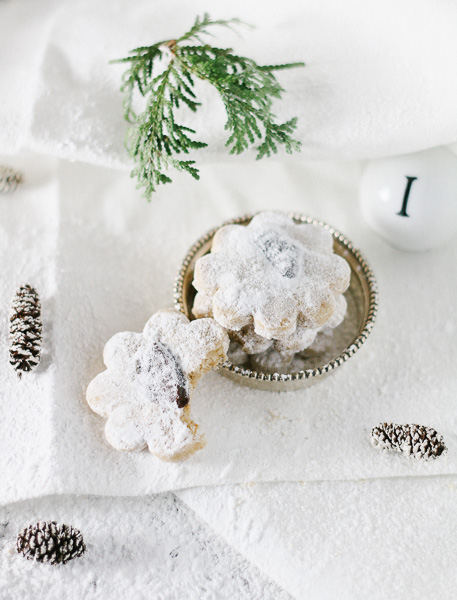
Now…on to the food portion of this post! Cookies!!!!! Better yet, Christmas Cookies!!!! These are ACTUALLY the best Christmas cookies guys! I have yet to meet a single person who has tasted these beauties and hasn’t immediately said, “Wow! These are SO good!” Or, “Holy Crap! Can I get the recipe for these?”
When I brought my first prototype of these cookies to the gym a couple of weeks ago (because what better way to get rid of dozens of cookies than to tell class after class of sweaty CrossFitters that they’re welcome to a cookie or two on their way home?!), a few of them didn’t believe me that there was no gluten, dairy or eggs in these cookies either!
These cookies have everything that a Christmas cookie should have; a shortbread base (but a fool-proof version), toasted nuts, chocolate, and powdered sugar!!! Seriously, it doesn’t get better than that folks!
These cookies have been in our family for SO long that my Mum got her Aunt (a.k.a. my Great Aunt for those of you keeping track) to pull out her hand-written copy and then typed it up using her typewriter. Who knows how long this recipe had been in the family before that.
Based on the original name of the cookie recipe, Kourabiedes, I would say that they were once Greek Christmas Cookies. However, they’ve gone through so many iterations since that I’m not sure they would still qualify, so I hereby dub them Paleo-ish Greek-ish Christmas Cookies! (I know the name doesn’t have quite the same panache as Kourabiedes, but it’s best I’ve been able to come up with).
The original recipe has no mention of chocolate. Mum, known as “Chocolate-face” by the neighbourhood parents when she was growing up, added chocolate chunks to the recipe before she met my Dad. Quelle surprise.
The next iteration came about with Mum meeting my Dad who is, unfortunately, severely intolerant of almonds. In her brilliance, Mum changed the toasted almonds to toasted hazelnuts. I say brilliance because the mixture of the chocolate with the toasted hazelnuts and the icing sugar, pretty much means that these cookies taste like Nutella; but the best kinda of Nutella because it has all the shortbready goodness holding it together in a bite-sized cookie shape!
Now that I’m the one that’s intolerant to most everything, I’ve since adapted the recipe further to be gluten-, egg-, and dairy-free, and changed the hazelnuts to walnuts! (As a kid, I used to make jokes that Dad was allergic to EVERYTHING on the planet; turns out that by the tender age of 27, the joke would actually be on me…karma is a b*tch).
I’ve also taught myself how to make my own icing sugar because, as some of you may know, regular store-bought icing sugar has corn starch in it! I am, of course, passing this new-found skill on to you guys in this recipe! (By the way, making your own icing sugar is SO unbelievably simple, I don’t know why people buy it!)
Now…how many of you have ever tried to make shortbread? Not many eh? Perhaps, you thought it was too hard to make…?
Now, of those who have made it…how many of you, after making your shortbread, popped them eagerly in your mouth expecting this tender melt-in-your-mouth experience, and instead, ended up with this dense, pastey, flavourless mound of vaguely sweet carb-based papier-maché mush? Yea, that’s what I thought…
How many of those shortbread testers still like shortbread? Exactly…
Well…boy am I here to revolutionize your shortbread baking (and subsequent tasting) experience guys! This recipe really IS simple to make! And, the addition of the nuts to the recipe means that while these cookies don’t necessarily melt in your mouth, they are still tender beyond belief, and DELICIOUS! Easy, AND tasty?! What more could you want?
I know that most of you have probably made your Christmas cookies for this year, but if you happen to have some extra lard, walnuts, chocolate, and icing sugar around, I would honestly give these guys a go! I promise you (and anyone else you love enough to actually consider sharing these with), you won’t be disappointed.
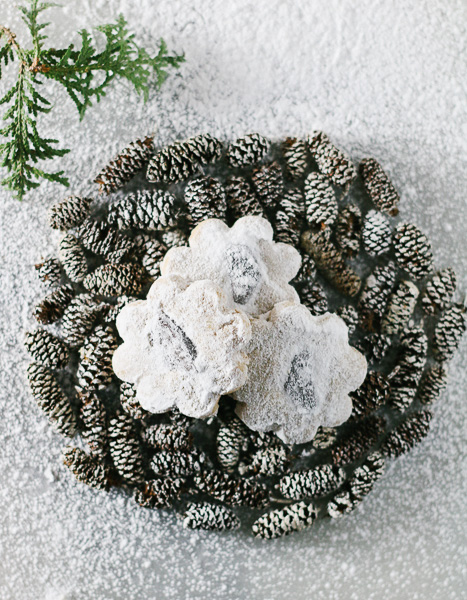
Paleo-ish Greek-ish Christmas Cookies
Tender, nutty, powdered sugary, chocolate chunky, and shortbready, these easy-to-make Paleo-ish Greek-ish Christmas Cookies are just about the best Christmas cookies you’ll ever have! Seriously!
- Prep Time: 40 mins
- Cook Time: 45 mins
- Total Time: 1 hour 25 minutes
- Yield: ~ 4 dozen cookies
Ingredients
Cookie Ingredients:
- 1 2/3 cup lard
- 1 cup sugar
- 2 tsp vanilla
- 1 cup walnuts
- 2 1/4 cup arrowroot starch
- 2 cups oat flour
- 1/2 cup quinoa flour
- 2 tsp xantham gum
- 1/4 tsp salt
- ~ 1 cup semi-sweet chocolate chunks I use Lindt Zartbitter couverture chocolate.
Icing Sugar Ingredients:
- 1 cup sugar
- 1 tbsp arrowroot starch
Instructions
To Toast the Walnuts:
- Preheat oven to 400 degrees Fahrenheit.
- Spread walnuts on a baking sheet, and toast in the oven for 5 minutes.
- When cooled, finely chop walnuts.
To Make the Cookies:
- Turn the oven’s heat down to 325 degrees Fahrenheit
- Cream lard and sugar in a mixer on medium speed until translucent and fluffy (~5-10 mins).
- Add your vanilla. Continue creaming until vanilla is incorporated.
- While everything is creaming, sift your flours, xantham gum, and salt together in a mixing bowl.
- Whisk the flours until everything is equally mixed.
- Add the chopped walnuts to the creamed lard, sugar, and vanilla.
- Once the nuts are mixed in, begin adding your dry flour/salt mix 1/4 cup at a time until you have a recognizable dough. You should be able to pull a piece off between your thumb and forefinger and have it rest on your thumb, no sagging or moving of any kind.
- Stop mixing once everything is evenly incorporated. If you have any flour left, keep it for rolling the dough out.
- Dust your counter with flour (either some of the flour you had left or more oat flour), and roll out about 1/2 of your dough until it’s about 1/4-1/2″ thick.
- Cut with whatever cookie cutter you like (Ideally one that is about 3″ in diameter, and doesn’t have too many sharp corners. Corners make for bigger issues trying to get the cookie out of the cutter unmangled).
- Using a spatula, scrape the cookies off the counter and place them on an ungreased baking pan about 2 cm apart.
- Lightly push chunks of your favourite chocolate in the centre of the cookies.
- Re-shape the leftover dough on the counter, re-roll it, and cut more cookies, adding chocolate as you go.
- At this point, folks usually run out of space in their oven or baking sheets, so I would recommend chilling the remaining 1/2 of the dough while the first batch bakes.
- Bake the cut cookies for 15-20 minutes, until they have a faintly tanned rim on the outside.
- Cool for ~5-10 mins.
To Make the Icing Sugar:
- While the cookies are baking, place the sugar and the tbsp of arrowroot starch in a blender. I used a smoothie blender.
- Blend for about 5 minutes, or until the sugar has lost much of its granular quality.
To Assemble the Cookies:
- Once your icing sugar is made and your cookies have cooled, carefully scrape your cookies off the sheet, one by one, dipping them in the icing sugar on their way to the cookie tin. They may feel a bit crumbly now, but they will firm up in the tin.
- Once a layer of cookies is finished, sprinkle some additional sugar over the cookies.
- Place sheets of wax paper between each layer of cookies.
Finish your Baking:
- Repeat the rolling, cutting, baking, cooling, and assembly steps with the remaining 1/2 of the dough, using whatever icing sugar remains.
Serve with chilled coconut milk!
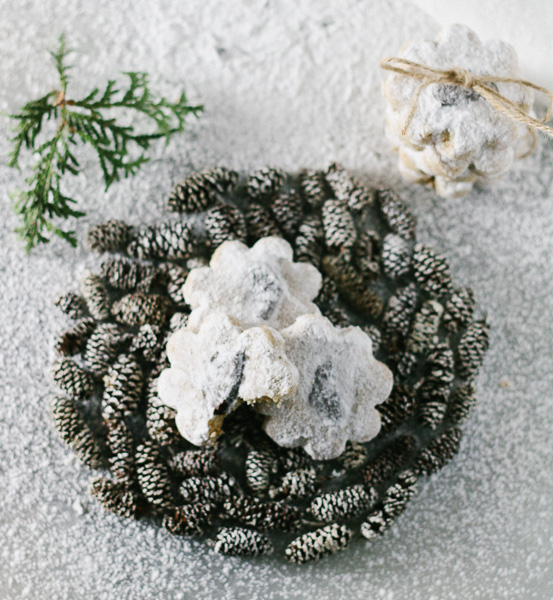
Now…just a couple tips and tricks for this recipe:
- If you can eat hazelnuts, I would HIGHLY recommend using them instead of the walnuts. Because…well…Nutella!!! If you do use the hazelnuts, treat them as you would the walnuts in this recipe.
- Like my Chocolate Chip Cookie post, pick a chocolate you would want to eat on its own before shoving a chunk of it in the middle of your cookie! I use Lindt’s Zartbitter Couverture chocolate palettes, which I cut in half before putting them on the cookies. I’ve only been able to buy this chocolate in a Lindt store, so if you’re at a regular supermarket, pick one of the higher quality chocolates such as Lindt or Camino, and pick something in the 55-70% cocoa range. I promise, it’s worth it!
- Make sure you keep a decent layer of flour under the dough (and on top) as you roll it out. It will make your life easier as you scrape the cookies off the counter.
- Once the dough ball gets small enough, you can use your hands to flatten it instead of a roller. I find it faster to do it that way when there isn’t that much dough. As long as the cookies are more or less the same thickness, they’ll bake evenly.
- Those of you who don’t have a mixer, it IS possible to make this recipe by hand. My great aunt wouldn’t have had a mixer for some of the years she was making these cookies, but I’m not going to say that it will be as much fun. If, however, you wanted a reason to skip the gym that day, mixing cookies by hand could be a decent one…
- Making the icing sugar without a blender, however, is not possible. In this case, I would go to the store and buy the icing sugar, unless you’re severely intolerant/allergic to corn. In that case, you may be a bit out of luck.
- As for the type of blender you should use to make the icing sugar, I would say that you can use any blender except an immersion one. I have images of powdered sugar all over my walls trying to use an immersion blender for this recipe. I also just don’t imagine that the small blade would do AS good of a job blending things down with pretty much only one cup of sugar in the bowl.
- Obviously, these cookies aren’t full Paleo. I’ve removed the gluten and the dairy for y’all, but unfortunately, I don’t think there is a way to remove the sugar from this cookie recipe (and definitely no way to remove it from the icing sugar) and still maintain the cookie’s texture.
- Finally, heads up guys, these cookies are delicate when they come out of the oven. They do, however, get more solid the next day. This is the only slightly difficult part of making these cookies.
And that’s about that guys! I would also like to note that as long as you don’t over beat the flour into the wet ingredients, there really is no other way to screw up these cookies. You COULD see some variations between batches because flours of any kind react differently to environmental factors such as humidity. This means that some days you won’t need to add all the flour to get the same doughy texture vs others where you do need to add it all to get the same texture.
You could also accidentally add too much flour (i.e. add it all on a day where the recipe would have been fine with slightly less) and the cookies will be slightly tougher, but nothing even REMOTELY close to most other shortbread fails I’ve tasted. In other words, every time you make these cookies, I can almost guarantee they’ll taste better than the above-mentioned chunks of pastey, flavourless, vaguely sweet carb-based papier-maché mush.
Ok…THAT’S about that! Stay tuned next week guys! I’ve been working on a recipe for Coco-nog!!!! So tasty, and so easy to make (it legit takes 10 mins of active prep time). You’ll be tossing that nog back at your New Year’s Party like every other non-culinary leper in the room!
Per usual, if you have any questions or comments, please do not hesitate to contact me, or comment below!
Ciao for now!
